Max Factory Gamera 95 build up guide.
I recently had the opportunity to buy a Max Factory Gamera 95 kit. I’d been looking for a non-Godzilla kaiju kit for a while and price and opportunity collided and the outcome was me walking out of Showcase with a cool new kit.
First off, let me state in no way do I consider this article a "how-you should-do-it". This is strictly "how-I-did it". I feel strongly that there are contributors to this page that are more experienced and talented then I am. So why am I doing this? Because I felt like it would be fun. And because I enjoy reading about how other people build up their kits I reasoned that someone else might like to read about how I build mine.
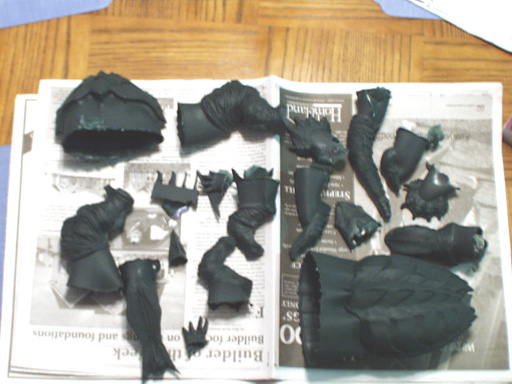
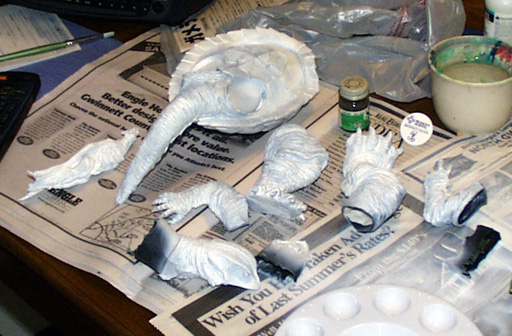
Part 1 – Unpacking
At this stage I see endless opportunities for my kit. Man, there are some teeny little parts here, but it doesn’t look to complex and the detail is awesome.
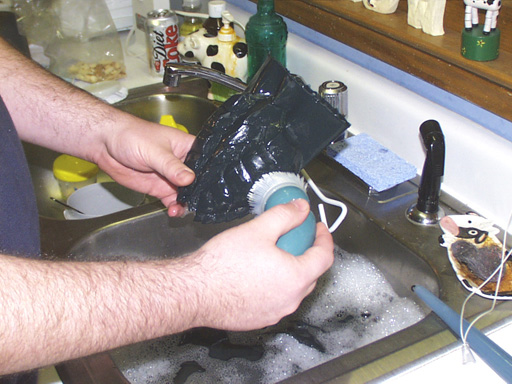
Part 2 – Washing
Washing your vinyl or resin kit is essential to remove the mold release from your kit. Mold release helps keep the casting material from sticking to the mold so it stands to reason that it would also serve to keep primer and paint from sticking to your kit. I usually just use dish soap and water. I scrub the parts down and rinse them off really well. I also use this time to gain familiarity with each part.
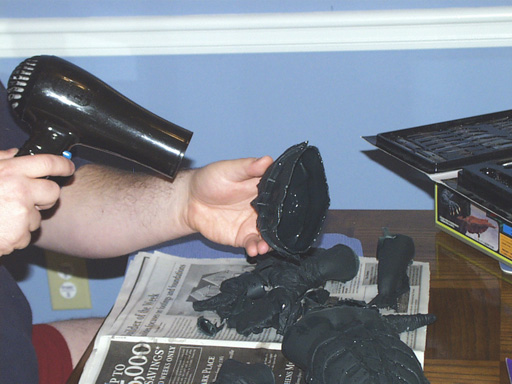
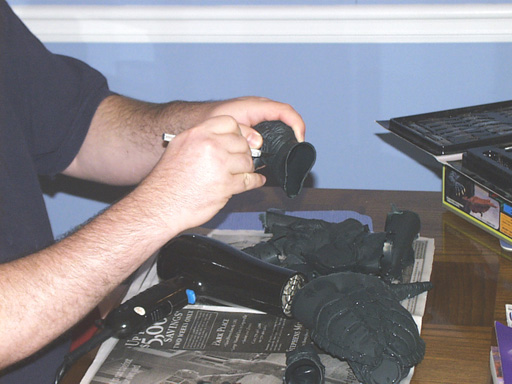
Part 3 – Softening
I’ve yet to find a kit that didn’t need some trimming or cleaning up of excess material (flash). This kit has several parts with large amounts of thick vinyl that needed to be trimmed. By using a hair drier I’m able to soften the vinyl making trimming easier. Sometimes I get a vinyl kit that has parts that are either deformed or don’t fit well together: the two pieces of Gamera’s shell in this kit for instance. Using a hair drier to soften up parts works well here, too. Afterwards, running the softened and reshaped parts under cold water can help them keep their new shape.
Part 4 – Trimming
If I’ve learned anything about trimming its this: don’t trim your own flesh! If I’ve learned anything else its that you CAN’T under trim. I always do a broad trim on each part and then many precise trimmings until I get the part as close to flash free as possible. If two parts still don’t fit well I keep trimming off smaller and smaller amounts until the fit is as good as I can get it.
Part 5 – Gluing
I use any kind of "super glue" for both vinyl and resin kits. For this kit I used glue that came in a pen which allowed me greater control of where the glue went.
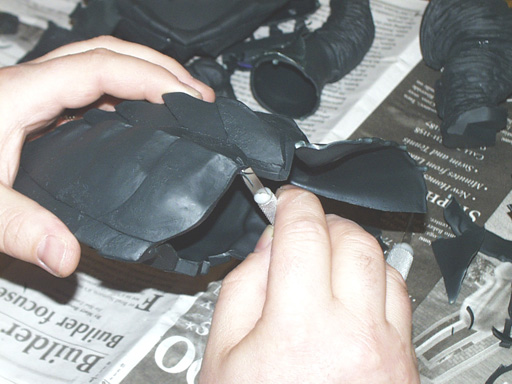
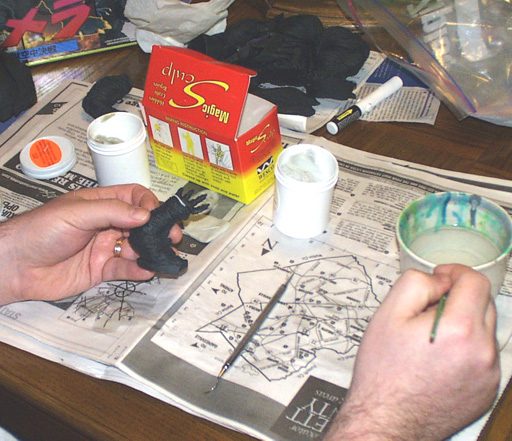
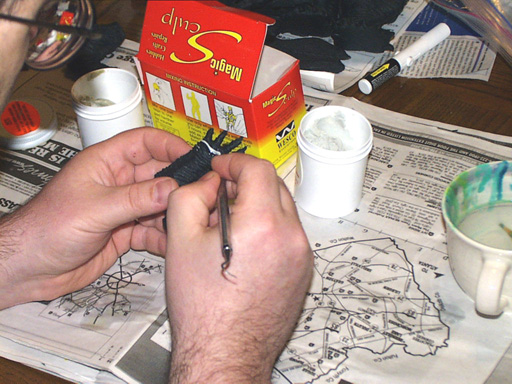
Part 6 – Puttying
I’ve yet to perfectly trim a kit, which means that I use a lot of putty to fill in the areas I’ve over trimmed. I’ve also used putty to fill in casting flaws and to resculpt detail that I wasn’t happy with. I hate puttying! It’s messy and sticky and if you don’t get it right it looks like crap. But…when done properly it can really make a kit sing. I buy mine right from the manufacture’s web page at http://www.magicsculp.com/. I paid 8 bucks plus shipping for 4oz of this two part putty about 6 months ago and I’ve used less then half. Of the putties I’ve used, Magic Sculp is the easiest to work with. It takes detail well and can be worked in very small amounts. I like to apply small amounts and work it into the kit with my fingers and a wet paintbrush. Magic Sculp smoothes beautifully with water. I use dental picks and scaling tools to work detail back into the kit
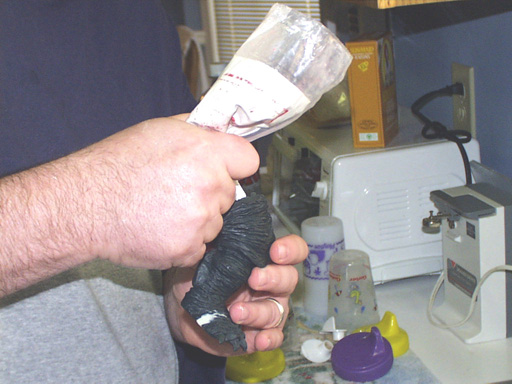
Part 7 – Plastering
I’ve never done this before. I decided that I wanted to give this kit a little weight so I mixed up a little plaster and poured it into the legs. I shook the legs to pack the plaster into each and every crevice and then poked the hardening mixture with a toothpick to release and air bubbles that might be trapped.
Part 8 – Priming
Oh boy, this was a mess. I like what priming does for my kits in general. It can reveal any manufacturing flaws that I missed during the puttying stage and it can also reveal any flaws in the putty job I’ve done. A nice even color can make the kit easier to paint and a white undercoat can really make colors "pop" out. I’ve used a couple of different primers but lately I’ve been using auto body primer. It works the same as a hobby primer and it’s a lot cheaper. But for some reason the vinyl on this kit started absorbing the primer. The primer never dried completely and stayed sticky. What a mess! I’ve never had this problem before and I’ll be sure to test any primer I use on a scrap piece of vinyl on any new kits from now on.
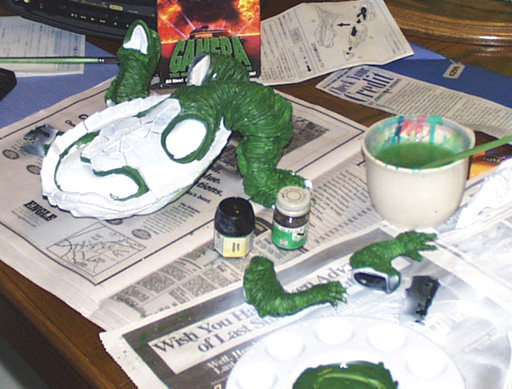
Part 9 – Painting
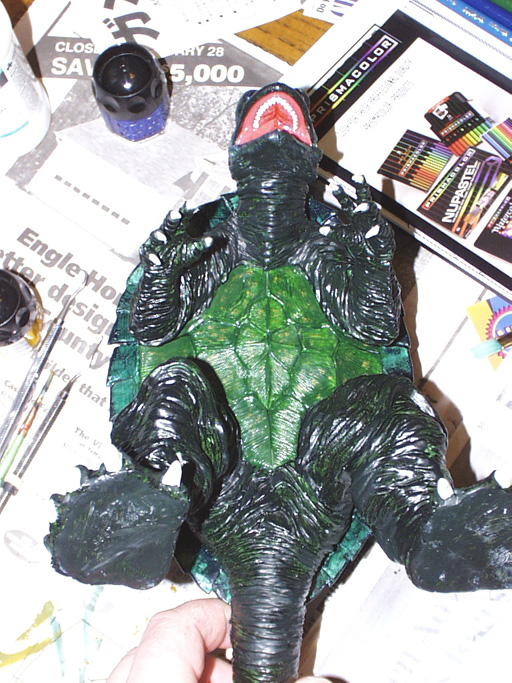
This is my favorite part of the process. I enjoy building my kits but painting it what its all about for me. I thought about a couple of approaches for painting Gamera. I could duplicate the paint job on the box – which by the way has the nicest packaging of any kit I’ve built – but its already been done and I thought it was a little boring. I thought about painting as close to the way Gamera looked in Guardian of the Universe, but I found trying to watch the movie and paint was way too annoying. So, I struck out on my own and created a dark, nighttime paint scheme. I decided that it would be best to paint the kit in three separate schemes; one for the arms, legs, head and tail, one for the upper shell and one for the lower shell. I started with by painting a light green undercoat on the arms, legs, head and tail using a mixture of Citadel Colors Snot Green and Polyscale German Dark Brown.
A word about the paints I use. I really love the Citadel Colors line. The paint is nice and thick and goes on with a smooth solid coat. It also thins and mixes well. The colors are nice and vibrant and stay true as they dry. What you see in the jar is what the paint will look like dry. This is the first time I’ve used Liquitex paints. These paints tend to be a little trickier then the Citadel paints. The ones I’ve tried go on translucent and can take some getting used to, but once I adjusted to them I really enjoyed working with them. I’m able to get much subtler effects using them rather then the Citadel Colors paint line.
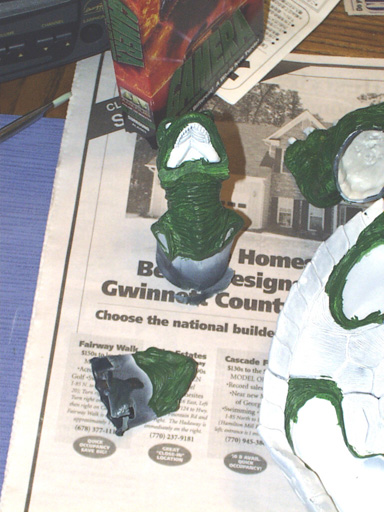
Once the base coat was dry I went back over it with a mixture of Liquitex Sap Green Permanent and Citadel Colors Chaos Black making sure that I let the under coat show trough in spots. When I paint I work very fast and will often use whatever I’m painting on as a palate. I tend to blend colors directly on the kits that I paint. I find that I get a really spontaneous lifelike look that way.
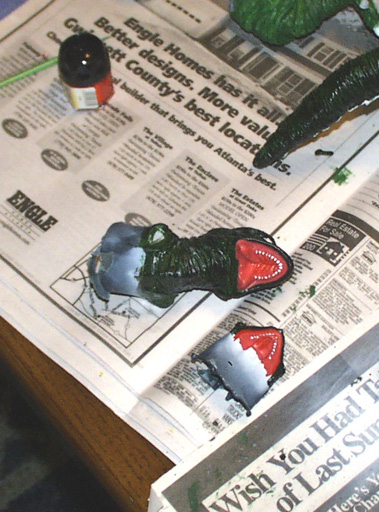
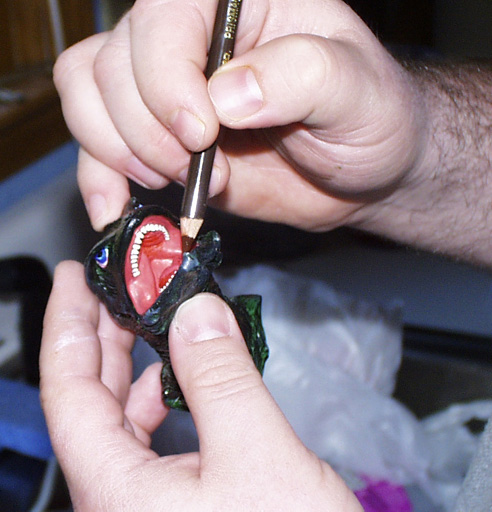
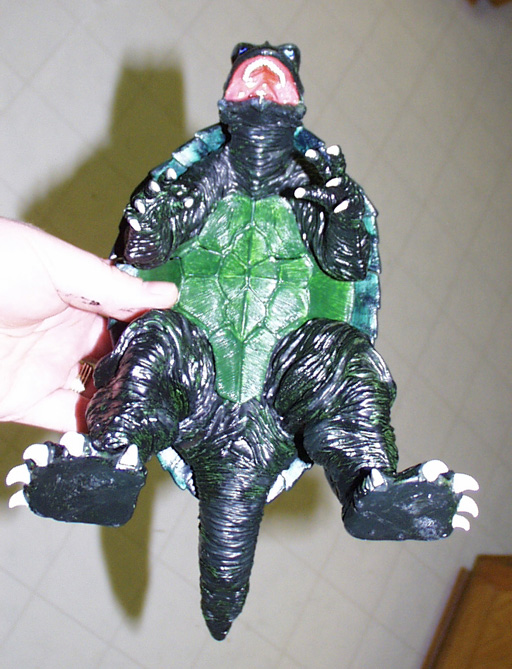
Gamera’s mouth was painted with Citadel Colors Skull White tinted with Blood Red.
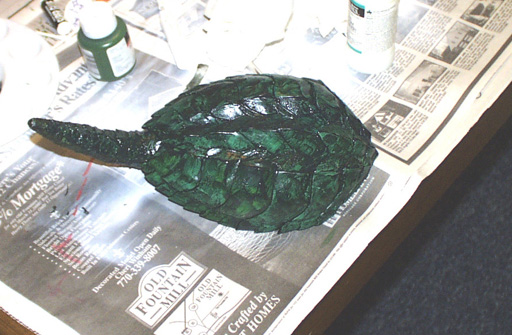
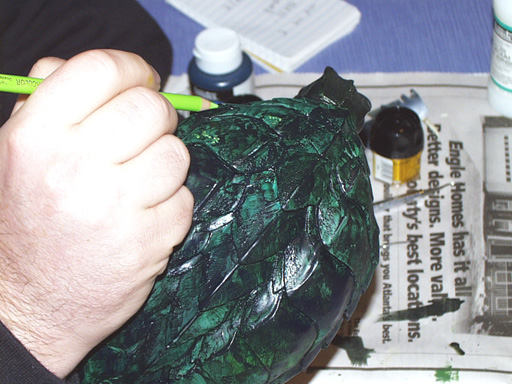
For Gamera’s outer shell I chose a mixture of Liquitex Phtalcyanine Green and Citadel Colors Chaos Black. I painted each scale of Gamera’s shell with a stroke that radiated downward. I used a heavy amount of paint at the seam of each scale and pulled my paintbrush down and outwards giving the scales a "tortoise shell" look. I followed this scheme down the scales on Gamera’s tail being careful to edge those smaller scales with the same color. I flipped the shell over and painted the underside lip of his shell the same color as the top.
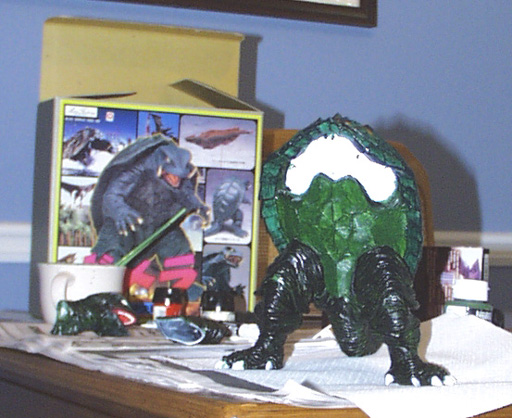
For the underside of Gamera’s shell I used pure Liquitex Hooker’s Green Permanent. I also glued in the legs so I could start to get a feel for what the combined color schemes would look like. I LIKE it!
Once I had my base coats applied I gave the entire kit a coat of Krylon matte finish to seal and protect the paint job.
I love painting the eyes on my kits. I really feel that nothing give a kit more personality then its eyes. I haven’t experimented with glass eyes yet. They look pretty cool and can really give a kit a professional looking finish, but I’ve yet to see glass eyes that has any personality to them. For Gamera’s eyes I started with a base coat of Citadel Colors Chaos White tinted with Bad Moon Yellow. I then used a fine brush to pick up pigment from a Prismacolor Carmine Red watercolor pencil and applied around the edges of Gamera’s eye socket. For his irises, again using a fine brush to apply the pigment, I used a Prismacolor Copenhagen blue watercolor pencil feathering it slightly. I then used Citadel Colors Storm Blue to line the iris and Chaos Black to dot in the pupil. I used a Prismacolor Carmine Dark Umber pencil directly on the teeth to stain them. I did the same for Gamera’s tusks, which I will apply after the rest of the kit is assembled.
Part 10 – Finishing Up
To give Gamera’s eyes and mouth a wet look I coated them with a thick layer of Liquitex medium viscosity acrylic gloss medium and varnish. I was pretty freaked when I first applied it because it goes on opaque but once it dries it give a beautiful, clear wet-looking coat. The wet eyes and mouth really help give the kit a "life-like" look.
I wasn’t happy with the fit of Gamera’s arms, head and legs once they were glued into his shell. I went over the seams with a little Magic Sculp and also filled in some gaps I noticed around Gamera’s legs. I probably could have gotten away with not filling in either of these areas but I would have always noticed they were there and regretted not taking care of them.
After the putty had set up I repainted those areas as well as any other areas that needed touching up.
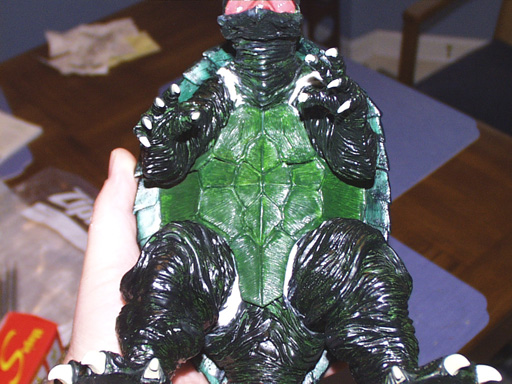
I really like working with these Prismacolor watercolor pencils. I’m able to do some really fine detail work with them and because they’re watercolor I’m able to blend and manipulate the colors easily. Gamera’s shell had a bunch of neat little nodules that I wanted to stand out from the rest of the shell. I took a Prismacolor Spring Green watercolor pencil and lightly ran it over the nodules to give them the appearance of barnacles or growths.
I felt that his inner shell needed a little extra attention as well. Again using a Prismacolor watercolor pencil, this time I chose Golden Rod, I drew a pattern over the grooves of his shell. .
Gamera’s nails and claws were painted with Citadel Colors Rotting Flesh taking care not to paint into Gamera’s cuticles ("really, I said, monsters are such interesting people….").
I glued on Gamera’s tusks and gave the whole thing another coat of Krylon matte finish.
And its….DONE!
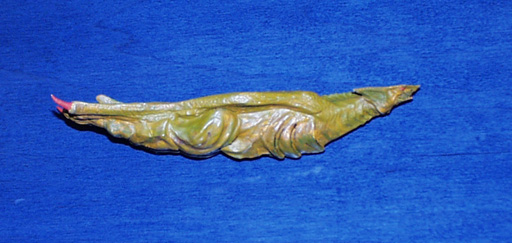
Gyaos
Gyaos was a pain in the butt. While I was trimming it was hard to tell what was flash and what was Gyaos. Once I got it trimmed and assembled I found that it needed a lot of putty work. Once that was done I was able to prime and paint it. Gyaos is one nasty looking critter so I decided that it needed one nasty looking paint job. I mixed Citadel Colors Leprous Brown, Snot Green and Testers Model Master Marker Red for the base color. I also used Marker Red for its eyes and claws. I then went over the still wet kit blending in more of those colors to darken in shadows or bring out highlights. Once the whole thing was done used a Prismacolor Dark Umber watercolor pencil to further darken in the shadows.
A word about photographing my kits. I use an Olympus D-500L digital camera. I take my pictures with super high quality (SHQ) resolution. I run the JPEG files through Adobe PhotoShop 2.0 to process the images. I do this for a variety of reasons. I can crop of rotate and images. I can also correct color and contrast settings. I will also use the program to remove unwanted background images. One thing I do not do is edit the image itself. I do not retouch any of my kits to correct a bad paint job or to change a detail after the fact. What I paint is what I post. After I’m done editing the image I export it to a high quality JPEG file and send it off for posting.